Preliminary analysis
Volvo analysis thus far.
Must replace -Driver side rear floor panel
Cost: Minimal
Minimum replacement
Optimum replacement
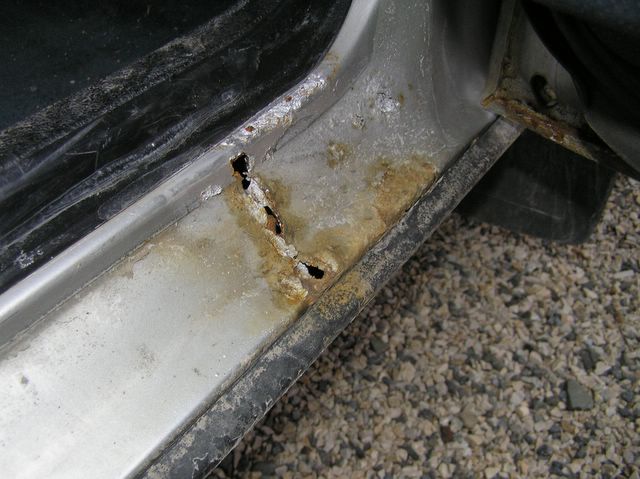
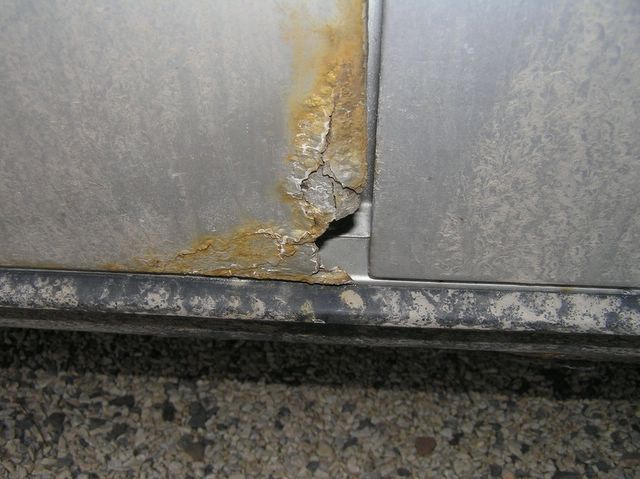
-Driver side rocker panels (Inner/Mid/Outer)
-Driver side rail
-Driver side rear floor panel
-Passenger side rocker panel (Inner/Mid/Outer) -Rear passenger door
Cost: 350+
I haven't taken out carpeting yet, so this preliminary analysis is from the pictures ONLY. I probably won't get a chance to remove the carpeting until spring break, or just before.
From what we saw with that panel I think the replacement, either a genuine floor panel or just a piece of bent steel, should be welded in. Every extra hole that is put into the car and doesn't need to be there simply gives water another place to hide and corrode the car much faster.
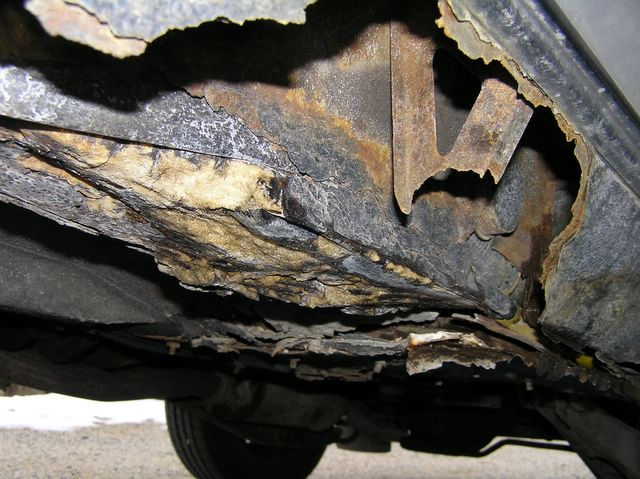
I also discovered why 85 was the worst year for Volvo bodies. Apparently the Swedes in there eco friendly ways switched from the standard rust proofing to a water soluble more eco friendly rust proofing solution while keeping a standard steel frame. In 86 Volvo employed galvanized steel in their frames. This however isn't as bad as it seems. If you take a look at the pictures of the underside of the car you will notice there is some sort of coating that doesn't look like metal. That is the rust proofing! Apparently there was more to the system than just the water soluble compound. This would explain why as of now the worst parts aren't the floor panels, but the rocker panels. I have heard that you can still buy this rust proofing material because when it does come off it should be replaced. This is a very promising idea.
Must replace -Driver side rear floor panel
Cost: Minimal
Minimum replacement
- Driver side rocker panels (Inner/Mid/Outer)
- Driver side rail -Driver side rear floor panel
- Passenger side rocker panel (outer)
Optimum replacement
-Driver side rocker panels (Inner/Mid/Outer)
-Driver side rail
-Driver side rear floor panel
-Passenger side rocker panel (Inner/Mid/Outer) -Rear passenger door
Cost: 350+
I haven't taken out carpeting yet, so this preliminary analysis is from the pictures ONLY. I probably won't get a chance to remove the carpeting until spring break, or just before.
From what we saw with that panel I think the replacement, either a genuine floor panel or just a piece of bent steel, should be welded in. Every extra hole that is put into the car and doesn't need to be there simply gives water another place to hide and corrode the car much faster.
I also discovered why 85 was the worst year for Volvo bodies. Apparently the Swedes in there eco friendly ways switched from the standard rust proofing to a water soluble more eco friendly rust proofing solution while keeping a standard steel frame. In 86 Volvo employed galvanized steel in their frames. This however isn't as bad as it seems. If you take a look at the pictures of the underside of the car you will notice there is some sort of coating that doesn't look like metal. That is the rust proofing! Apparently there was more to the system than just the water soluble compound. This would explain why as of now the worst parts aren't the floor panels, but the rocker panels. I have heard that you can still buy this rust proofing material because when it does come off it should be replaced. This is a very promising idea.
posted by Eric at 2/24/2005 09:47:00 PM
0 comments
![]()